One of the greatest things is to get a new computer. Whether it's a laptop or a desktop, getting a new computer compares to almost nothing else. Plenty of people know the feeling of getting that new machine home, plugging it in, and firing it up.
Even if you use the same programs, and surf the same sights, they will seem fresh and new. Especially if it's been a couple of years since you've purchased your most recent computer. Because technology increases so fast, after a year or two you'll be absolutely amazed at how much faster and clearer everything seems.
But if you walk into any computer shop, you might be overwhelmed. There are so many different computers to choose from, so it can be difficult to find the one that you want. That's why it's good to get an idea of what you're after before you step into the store.
First of all, think about the computer that you're using now. What kinds of things do you like about it? For example, if you are always running out of space on your monitor, then getting a bigger monitor might be a good option. Measure the monitor that you have now, and try to decide what size would be optimal.
Another thing to consider is processor speed. Generally speaking, the higher the number that is listed as the processor speed (in gigahertz, or GHz) the faster your computer will be. This is a general rule, and it doesn't apply in every situation.
Memory is also a consideration. The more memory your computer has, the more programs you can run at once, or the more robust programs you can use. If your current computer freezes or runs slowly when you open up too many programs, take note of how much memory you currently have.
And of course, the last decision you'll need to get is whether to get a laptop, or a desktop. If you are the kind of person that likes to use your computer wherever you go, then obviously a laptop is the kind of computer you should get. However, if you have a laptop and it's been ages since you've taken it anywhere, then you might consider getting a desktop.
One of the advantages of getting a desktop is that you'll have much more room for expansion in terms of memory. You can be quite limited if you want to add memory to your laptop.
Now that you know the basics, it's time to figure out what you want, and go shopping. Have fun.


Custom Search
Tuesday, October 11, 2011
Saturday, October 8, 2011
Chrome Remote Desktop Beta Extension
I think it was last year when Google first mentioned that they would add remote desktop capabilities to Chrome OS and the Chrome web browser. Yesterday Google released a first beta version of Chrome Remote Desktop, an extension for the Chrome browser on the official Chrome Web Store.
Google points out that the goal of the beta release is to “demonstrate the core Chrome Remoting technology and get feedback from users”. The extension allows users to share their computer for remote access, or get access to another computer with a one-time authentication code.
The extension can only be installed if the user is logged into a Google account. Once that is done it is necessary to give the extension additional privileges before it can be used to create a one-time authentication code or to access another machine by entering a code into the browser interface.

Remote desktop is a cross-platform application which means that remote connections to clients that run other operating systems work. You could for instance connect from your Windows PC to a Linux tablet, or from a Macbook running Chrome to a Linux distribution.
When I tried to use Chrome Remote Desktop on my main Windows PC and my Acer netbook, I could not create authorization codes. Chrome always displayed “Your Chrome Remote Desktop session has ended” with no option available but to click OK to go back to the start screen.
I discovered that Chrome Remote Desktop requires access to TCP port 443 and 5222. A support page has been created for users who encounter errors using the remote desktop functionality.
The user with the authorization code gets full access to the other user’s computer system including access to applications, emails, files, documents and the history.
Chrome users can download and install Chrome Remote Desktop, a 19+ Megabyte download from the official Chrome Web Store. Since it is a beta release it is advised not to install the extension in a productive environment. You can use other applications like Teamviewer to connect to other systems remotely.
Tuesday, October 4, 2011
GGrep, Windows Text Search, Replace Software
GGrep is a text search and replace software for the Windows operating system that is based on the original Grep tool of Unix based machines. The portable Windows software comes with a user interface that displays the majority of features right on the start screen. A basic search requires a search term and the selection of a root folder on a connected hard drive. A click on Search parses all files and displays all files containing the search term in the results listing.
The files are displayed with their name, the row and column the phrase was found and the phrase surrounded by words before and after. One of the issues that I found was that it was not possible to scroll horizontally. The only option to display all text was to increase the window size significantly.
Filters are available to narrow down the search results. It is for instance possible to search only specific file types or folders, or to exclude files and folders from the search.

Other filters include making the search case sensitive or to limit the results to full word matches. GGrep supports regular expressions just like the original grep application. This opens up several interesting options for more powerful search and replace operations. You could for instance search for euro|dollar to find documents containing either the phrase euro or dollar.
Another interesting feature of GGrep is the option to replace text. While it is possible to use simple text to text replacements, one could use regular expressions for better text matching.
Please note that the program is not displaying a list of possible matches first. When you click Replace the replacing of text happens instantly and without option to undo the changes (other than reversing search and replace strings).
The results of a search or replace can be exported into a csv file which can then be imported into programs like Excel. Windows users who are looking for a powerful search and replace tool should take a closer look at GGrep. The software is compatible with all recent 32-bit and 64-bit editions of the operating system.
Saturday, October 1, 2011
What Is Adobe After Effects and What Can It Do?
Adobe After Effects is software that is used for "behind the scenes" movie production. It can turn one of the worst videos you've ever made into an unbelievable masterpiece. This does take a little work on your part, but the end result is always well worth it when used properly.
Here are a few different ways you can take advantage of Adobe After Effects:
Cinematic Visual Effects
One of the quickest ways to see this software in action is by looking at the visual effects. One of the best parts to action movies is their ability to turn something unrealistic into an authentic and appealing story. You don't have to look any farther than movies like the Transformers or even Star Wars.
However, a lot of people are just looking to turn a home video into a standard version with a little added flair. The software allows you to do this with an efficient approach. So, whatever type of enhancement you're looking to make, this software can help make it happen.
Motion Graphics
If you're into science fiction movies, you don't need to look any further than the Harry Potter movies. Being able to provide the illusions of walking through walls, or transforming from a human to an animal can be very exciting.
So, let's say you're making a little animation and you decide to give each character magical powers. Adobe After Effects would allow you to accent those parts of the movie to make it more captivating to the viewer. If you head over to YouTube you will see this type of concept all the time.
Background Features
Have you ever gone to the movie theater and saw a hanging microphone over the characters? We've come across this a couple times, and always blame it on the editing department of the production team. While it is their fault, this could have been fixed with the Adobe After Effects CS4 Rotobrush.
This allows you to keep moving objects in the background from sticking out like a sore thumb. Thanks to the transparency feature on the video editing software, your problem will seemingly disappear. The Rotobrush can also help you redefine areas that need to stand out. A good example of this would be redefining the edges to offer a sharper look in HD format.
Conclusion
These are just a few of the many benefits available with Adobe After Effects. Our recommendation is to look over all their information, test the product out, and then figure out whether or not it's the right choice for you. Everyone has different tastes, so we understand it's not for everyone.
We also know that the individuals that want to increase their popularity in the movie production industry should consider this product a necessity. You just have to try it to experience all the benefits.
Discover how to use the special features in Adobe After Effects CS5 to create award winning video effects from an experienced professional. Learn more about the Adobe video editing program through Adobe After Effects Training.
Friday, September 30, 2011
SFV Ninja, Simple File Verification Software
Many download portals and websites display file checksums on their download pages. The idea behind this is to give users the chance to calculate the checksum of the downloaded file to compare it with the checksum on the website. If the values are identical, then the file has not been tampered with (unless a hacker managed to alter the checksum on the page as well).
SFV Ninja is a portable software for Windows that can be used to calculate and display checksums of files that are accessible on the system. When you first start the program you have options to load individual files or files of a folder into the application. Users who have already worked with the program before can alternatively load a single checksum file or make the application crawl a folder for multiple checksum files to re-verify the data.
You can verify all files right away with a click on the Verify all files button. You may alternatively switch from the default CRC32 mode to MD5 or Sha-1 mode if those are preferred.

It may take some time to verify all files. The program managed to test 10 to 20 files per second on my test system. Each checksum is then displayed next to the program’s name and size in the interface. The information can be saved in sfv files which can be loaded again into the software to verify that the files have not been modified in the meantime.
Information that get saved include the file name and path, size and the checksum that has been calculated. When you load the sfv file into the application, you can re-verify all files again and compare the old and new checksum of each file with each other.
This can be handy to make sure that files in a specific directory have not been modified in the meantime, or to get a list of modified files in a directory. You can for instance use it to verify all files on a USB key, in a development directory or a shared network drive.
SFV Ninja is a portable software that is compatible with all recent 32-bit and 64-bit editions of the Microsoft Windows operating system. Yo can download the latest version from the developer’s website.
Wednesday, September 28, 2011
Mozilla Thunderbird 7 Email Client Released
Thunderbird has joined the rapid release process just like Firefox did. The two programs are now being developed and updated in sync, which means that you will see updates for both programs pop up at around the same time.
With the release of Firefox 7 came also the release of Thunderbird 7. The email program made a big jump from version 3 all the way to version 7, even skipping a version to sync with the Firefox browser.
Existing Thunderbird users should get update notifications right in the email client. They can then update from within without having to download the client from the official website. Users who have not received the notification of the update yet can check for it manually by going to Help > About Thunderbird.

The release notes list several changes and feature enhancements.
The Welcome to Thunderbird page after updating or installing the new version lists additional features. I’m not sure if they all made their way into this version or if they have been available before. Thunderbird 7 starts up faster and is more responsive according to that feature listing. A new troubleshooting information page is listed there as well. It looks exactly like the page of the Firefox web browser.
New users can download the latest Thunderbird version from the official Mozilla Thunderbird project homepage. It is available there for all supported operating systems and languages.
Are you using Thunderbird? Let me know what you think of the latest update.
With the release of Firefox 7 came also the release of Thunderbird 7. The email program made a big jump from version 3 all the way to version 7, even skipping a version to sync with the Firefox browser.
Existing Thunderbird users should get update notifications right in the email client. They can then update from within without having to download the client from the official website. Users who have not received the notification of the update yet can check for it manually by going to Help > About Thunderbird.

The release notes list several changes and feature enhancements.
- Thunderbird is based on the new Mozilla Gecko 7 engine
- Several user interface fixes and improvements
- Several fixes to attachment handling
- Ability to print a summary of selected email messages
- Platform improvements to Address Book
- Fixed several security issues
- Numerous platform fixes that improve speed, performance and stability
The Welcome to Thunderbird page after updating or installing the new version lists additional features. I’m not sure if they all made their way into this version or if they have been available before. Thunderbird 7 starts up faster and is more responsive according to that feature listing. A new troubleshooting information page is listed there as well. It looks exactly like the page of the Firefox web browser.
New users can download the latest Thunderbird version from the official Mozilla Thunderbird project homepage. It is available there for all supported operating systems and languages.
Are you using Thunderbird? Let me know what you think of the latest update.
Monday, September 26, 2011
Why Everyone Should Own an E-Reader
E-readers. Millions of people own one, and millions are thinking about purchasing one. This article will not provide you with any insightful information on which one to choose, but merely provide you with reasons why you need to make the investment. If you're thinking about making the investment here are some reasons why you need to consider the purchase of one of the many e-readers that are available today.
Availability
Have you ever driven to a bookstore only to find that they don't have the book you want? Or they sold out an hour before you arrived? With an e-reader you will never have that problem. If it's available for purchase you'll have your own copy in seconds. With the recent closing of Borders stores some are required to travel more than twenty miles to browse or buy a book. The e-readers allow for you to browse from the comfort of your own home and even save gas! What if your in need of large print books? An e-reader allows for the font to be set at your own preference, so you'll never need to worry if a large print book will be available.
Cost
The average cost of an e-reader ranges between $100.00-$500.00 bucks. There are quite a few different options available for purchase and you'll need to go through each to see which one is best for you. The kindle, nook, and iPad's are always great options (although there are more.) Also, the books that you'll purchase will be significantly cheaper than what you'll find in stores. For example, I bought a copy of The Help at a store for around $15.00. A copy on your e-reader? Around $10.00 bucks. Not only will you be saving gas money, but you'll save on each book that you download.
Magazines and Newspapers
E-readers are not only convenient for books, but you can also purchase magazines and newspapers. Subscriptions to magazines are cheaper on e-readers. I personally have a subscription to the Rolling Stone and it's 2.99 a month. If a newspaper like the New York Times isn't available in your area, you can have your own copy every morning. The cost of most newspapers are also considerably less.
Extras
Lets say you're trying to remember the book your friend told you about a month ago. All you can remember is one word from the title. Search using the one word you remember and look! You find the book in seconds. Or lets say you are reading a novel with words you are not familiar with--most e-readers provide the option to touch the word and immediately you'll have a definition. You'll also have the ability (on most e-readers) to connect to the internet and browse freely. Possibly the best benefit about some e-readers is that it allows you to share the books you've purchased with others. This option will save you even more money! The e-readers are small and portable, which will be much easier to take with you when you're on the go. Looking for a little more? No fear, you'll find plenty of other applications (or apps) such as games, calculators, Pandora, and countless others.
Even if you've purchased an e-reader you can still purchase books the old fashioned way
Personally, I prefer a real book. There's something personal about my own copy that an e-reader cannot replace. I actually received a nook as a Christmas present last year. I didn't know what to do with it, but I quickly realized that it comes in handy when I'm in need of a great read. Unfortunately, there are no bookstores in my area and my e-reader has provided me with an outlet to further my reading. My e-reader has not replaced my hard copy books and never will, but with hardly any other choice it has definitely saved me gas, and provided me with a way to keep on reading when I thought all hope was lost.
Friday, September 23, 2011
Use FireForm to fill out forms automatically
I was looking for a Firefox extension that would fill out certain forms automatically which would help me a lot because I’m filling out a lot of forms to test out new sites and register for products. The guys at downloadsquad found a nice Firefox extension called FireForm which does exactly what I was looking for.
Fireform is able to fill out most forms automatically when you right-click the icon of the extension in the status bar and select fill in this page – left-clicking the icon has the same effect. You will have to create a profile before you can start using the automatic fill option. The profile is independent from existing Firefox profiles and will be used only for the FireForm extension.
You can supply information like names, contact information (email, phone), address and misc information like birthday. Once the profile is created you can use FireForm or create more profiles for other users that use this computer.
There might be the time when you come upon a website that uses a field that is not covered by the default selection that you edited in your FireForm profile. It would then be time to add a custom field to FireForm by using the Display Fields option of it.
Now hover over the field that you want to add and FireForm should display information about that field, the most important is the name that the developers have chosen for it. Remember that name and go to tools > fireform > advanced profiles management and add a description that you can choose freely, a value that should be automatically entered and the trigger that was displayed when you hovered over the form.
Sites tend to use different names for the same subject and you will have to edit those settings often in the beginning. You can add additional triggers to a form by separating them with “;”.
Thursday, September 22, 2011
Types of Wi-Fi Encryption You Can Use
There are many types of Wi-Fi encryption you can use on modern Internet routers. So which one should you use? Many people don’t even use encryption, and those that do just pick an encryption type at random without knowing what they do. Most encryption types are better than nothing at all, but some are more suitable than others.
For a long time, WEP was considered to be an extremely good method of encrypting wireless connections. The acronym simply means Wired Equivalent Privacy. Originally it was only available in 64-bit configuration, but soon after 128-bit and even 256-bit encryption became available. Entering a 64-bit WEP Wi-Fi key was as simple as choosing a ten character hexadecimal number. Each character represented 4 bits, making 40 bits in total, and then 24 bits were added to complete the 64-bit key. WEP however, was proved to have many flaws mainly involving the short key size, which were relatively easy to crack. WEP also does not provide for security against altered packets – a process where packets of information is intercepted by an intruder and then altered before sending them back, making it look like the intruder is valid user.

These days, WPA (Wi-Fi Protected Access) and WPA2 have completely taken over from the old WEP encryption methods. You’ll probably still find WEP available on most routers, but it’s being phased out and someday it probably won’t be available at all. The main advantage WPA has over WEP is that it employs a powerful new feature called TKIP, or rather Temporal Key Integrity Protocol. TKIP is 128-bit, but instead of the key being static, it generates a new key for every packet of information that is sent, meaning it is a lot more secure. WPA also integrates a method of message integrity checks, used to defeat network attackers intercepting and altering data packets. WPA2 goes even further and replaces TKIP with CCMP. CCMP is an AES based encryption method that is much stronger even than TKIP.
In the home, you’ll probably want to use an encryption method called WPA-Personal. This is sometimes also called WPA-PSK. PSK stands for Pre-Shared Key, and is designed for home users and small offices where a server is not required for authenticating messages. It works by having each wireless device such as a laptop or smart phone authenticating directly with the wireless access point using the same key. Offices and large buildings may employ WPA-Enterprise. You can’t generally use this without a complicated authentication server set-up, but it does provide additional security.
Both WPA-SPK and WPA-Enterprise are available in WPA2, meaning even home users can now benefit from AES encryption over their Wi-Fi connections. All of these methods can transmit data at maximum speed, and you won’t notice any speed differences between each type of encryption. Therefore the recommendation is to use the best encryption you can. This means going for WPA2-PSK where you can in a home environment. There are new and more exotic types of Wi-Fi encryption becoming available, but for now even advanced users will find WPA2 more than adequate for most security applications.
If you are using wireless connections, you may want to check your router to make sure that it does not use encryption that can easily be cracked by users with the right toolset.
Tuesday, September 20, 2011
Google Plus For Everyone, No Longer Invite Only
It took Google some time to open their social network service Google Plus to the public. Up until now it was only possible to join the service after receiving an invite, or by accessing the site when Google removed the invite-limitation temporarily.
Google today over at the official Google Blog announced that Google+ is now available for everyone which means that anyone can sign up for Google+ without invitation. This step marks the transition from field trial of beta.
Users who want to sign up can head over to the official website at google.com/+ or http://plus.google.com/ to sign up for the service.

Google notes on the sign up page that Google+ is in Beta, which means that users may run into technical issues and other problems on the site during that time.
The very same blog post announced a slew of new and improved features. This includes hangouts on the phone. Users who connect to Google Plus via their phone can now join Hangouts just like desktop users can.
Hangouts are currently only supported on Android 2.3 and higher devices with front facing cameras. Google notes that iOS support will come soon.
Hangouts on Air is another new feature which allows Google Plus users to record a session. This session can then be watched by anyone. Hangouts got additional extras, including screensharing, a sketchpad, Google Docs support and an option to create named hangouts.

Google last week launched the Google+ Api that allows developers to create services and features around the social networking site. Today, Google is releasing an api specifically for Hangouts. Developers find more information about the available Apis over at the Google+ Platform blog.
More interesting to the majority of Google+ users is the improved Search in Google+. The search is now finding relevant people and posts, and “popular content from the web”.
You can read the full announcement over at the official Google Blog.
Monday, September 19, 2011
Use Windows 7 Backup to Schedule Automatic File Backups
Backing up your work is essential. Many of us keep important documents on our computers that include work files, pictures of the kids, insurance documents, even bank statements. Many of these files are lost forever if your hard drive fails and you have no backup. You may think that hard drives these days are better than they used to be, and never fail – a computer expert will tell you that all hard drives fail eventually. It’s not a matter of if, but when, the data storage on your computer will fail. On top of that, your computer is always at threat from viruses and malicious software, or from theft. Therefore it’s a wise precaution to have a backup, so that your precious files are in more than one location at any time.
There’s a lot of software out there that can be used to backup files to an external hard drive, or even to the cloud. But did you know that Windows 7 actually has some pretty sophisticated backup software built in? It can be used to make a single backup, or to regularly backup your files to keep your archive up to date.
You can backup to either a portable hard drive, to USB flash drives or to CDs or DVDs. The most popular method is to backup to a portable hard drive, as these are very cheap and can be easily connected and carried around. Portable drives are also very useful if you want to keep an off-site backup of your data.

You can find the options to backup your computer’s files from the control panel. Simply click on “start”, and then “control panel” and then find the option to backup your computer under the heading of “system and security”. You’ll be taken to a screen where you can set up a new backup or restore files if you already have an archive. You’ll need to be a computer administrator to do this, as you’ll see by the shield icon next to the link called “set up backup”. Clicking on this will start a wizard where you can set the parameters of your backup job.
You’ll need to select the device you want to use to hold your backups. Plug in a portable hard drive of suitable size to hold all the files you want to archive. The wizard will tell you the size of your drive, and the amount of free space you have on it.
On the next screen you can choose whether to manually select the files you want to backup, or let Windows 7 decide for you. If you have specific files and folders you want to backup, then do it manually but in most cases the automatic selection will work best. Click on next, and now you can see a summary of your selections. You also have the option here to set up a schedule for backups. A weekly backup is usually good enough, but if you are a heavy computer user then maybe select a daily backup.
You should now save your settings by clicking on the button to end the wizard. Congratulations, you’ve set up a backup job on your computer. All you need to do now is wait until the time you selected on your schedule, or you can click on the button “back up now” to start immediately.
Sunday, September 18, 2011
4 Reasons to Help You Figure Out The Unexpected Computer Shutdowns
During the daily using of computer, there are always something unexpected. When you are playing a fantastic computer game or watching a fierce and live ballgame, your computer may suddenly close down automatically. Such situation will always make us feel so annoyed. But when it happened frequently, you should notice that there are must be something wrong with you computer. So today, let's find out the reason and solve such bothersome problems.
1. Virus is the first thing you should blame.
Once you find that there are frequent unexpected shutdowns occurred, you should have your computer checked and find out whether it is invaded by computer virus. We know that virus was produced after the computer was invented. Since the Internet become widely used in nowadays, this also provide a better opportunity for virus to spread. One notorious of the virus is Shockwave which caused great damage to computers all over the world at that time and would close down your computer and restart it automatically.
In this case, we can seek help from the latest anti-virus software. After the whole check of your computer, such software will find out whether you computer is infected or not under most circumstances. Also some hackers will invade other's computer maliciously and place Trojan program in the computer in order to control every activity of it. And it is very easy for these hackers to make your computer shut down. On this occasion some of the Trojan cannot be clear away, so you'd better reinstall the operating system.
2. The accumulated junk files will cause automatic shutdown too.
We all know the junk files are everywhere in the computer. The old installing files, registry, and error reports documents are all junk files. Once you do not clean such files timely, they will accumulate and take up lots of the limited system resource, which will slow down the system and lead to unexpected shutdown.
In order avoid the automatic computer shutdown, you need to empty the recycle bin regularly and install some pc cleaner to clean up all kinds of junk files. Personally, I think the Advanced Systemcare Pro will be a good choice. Besides the function of system optimization, it also can sweep the useless information and delete it.
3. If there is something wrong with the CPU, then shutdown happens.
You can start your computer and enter the desktop normally even when some function circuits and the second level cache of CPU are damaged. While if you want to execute some special function, such as playing game or drawing a graph, the shutdown will occur immediately.
So if your shutdown is caused by such reason, first you can try to shield the second level cache or session level cache in CMOS. The next step is checking the system to find out whether it can operate normally. If not, you'd better replace the CPU with a new one.
4. Unsteady voltage also will cause the computer to close down.
Generally speaking, the power supply voltage range of a home computer is from 170 to 240 volt. If there is something wrong with the power supply, let's say the voltage of electric supply is under 170 volt, the computer will restart or close down automatically. Therefore, we can purchase an uninterrupted power supply or a wide switch power supply from 130 to 260 volt to ensure the steady operation in regions that supply instable power frequently.
Knowing the detailed reasons can helps us to solve the bothersome problem effectively. And I hope what I write will be useful.
Hi, I hope what I have shared in my articles can help you. I love to write about love, relationship, sexual health, skin care and everything that I'm interested in. For more information about Systemcare Software, check IObit.com and it's very helpful.
Saturday, September 17, 2011
Password Protect Firefox Bookmarks
Firefox bookmarks are accessible for all users of a computer system if one user account is used instead of individual user accounts. This can be a issue if you want to protect data from being seen or accessed by other users. But even if there are multiple user accounts, chance is that some may have access to your Firefox profile folder. A system administrator for instance would have that access.
Firefox bookmarks cannot be protected from prying eyes by default. Users with access can see the link titles and destinations of all bookmarks. Sometimes you may want to password protect and obscure links so that they cannot be opened or identified by third parties.
The Firefox add-on Link Password offers those options. The add-on adds two new options to the right-click bookmark’s context menu. This works both in the Bookmark’s Manager but also if bookmarks are displayed via a button in the Firefox user interface.

Encrypt this link password protects the link, with an option to randomize the link text as well to obscure the bookmark further and avoid identification of the link destination this way. When Encrypt this link is selected, a new window is displayed where a password needs to be entered. The Rename links box is optional.

The link will be replaced by a linkpassword url, the link title by a random page title. In this case, the link title was replaced by “Canada – Yahoo! Search Results”.

It can happen that a very strange looking link title will be selected. One of the links for instance was renamed to “Evighetens Filosofi – Visdomsord som passa dig… – Soker “Blue”, Sida 1″. It may make sense to select a custom link title manually instead, especially if you come up with a system that tells you – and no one else – where the link leads to.
When you open a password protected bookmark, you are asked to enter the password to decrypt the link and open the website.

This may be a bit inconvenient for bookmarks that you open a lot in Firefox, as you need to enter the password every time you open it in the browser. An option to enter the password once and store it for the browser session would be handy. I’d also like to see an option to protect all bookmarks with a single password automatically that you could enter to make all links available. This would make the extension more comfortable to work with.
Firefox users can install the Link Password extension directly from the official Mozilla Add-on repository.
Firefox bookmarks cannot be protected from prying eyes by default. Users with access can see the link titles and destinations of all bookmarks. Sometimes you may want to password protect and obscure links so that they cannot be opened or identified by third parties.
The Firefox add-on Link Password offers those options. The add-on adds two new options to the right-click bookmark’s context menu. This works both in the Bookmark’s Manager but also if bookmarks are displayed via a button in the Firefox user interface.
Encrypt this link password protects the link, with an option to randomize the link text as well to obscure the bookmark further and avoid identification of the link destination this way. When Encrypt this link is selected, a new window is displayed where a password needs to be entered. The Rename links box is optional.
The link will be replaced by a linkpassword url, the link title by a random page title. In this case, the link title was replaced by “Canada – Yahoo! Search Results”.
It can happen that a very strange looking link title will be selected. One of the links for instance was renamed to “Evighetens Filosofi – Visdomsord som passa dig… – Soker “Blue”, Sida 1″. It may make sense to select a custom link title manually instead, especially if you come up with a system that tells you – and no one else – where the link leads to.
When you open a password protected bookmark, you are asked to enter the password to decrypt the link and open the website.

This may be a bit inconvenient for bookmarks that you open a lot in Firefox, as you need to enter the password every time you open it in the browser. An option to enter the password once and store it for the browser session would be handy. I’d also like to see an option to protect all bookmarks with a single password automatically that you could enter to make all links available. This would make the extension more comfortable to work with.
Firefox users can install the Link Password extension directly from the official Mozilla Add-on repository.
Friday, September 16, 2011
Advanced Data Backup Considerations
In a home environment, many people neglect to backup their files and systems, and are then devastated when their computer fails taking all their precious files they’ve been collecting with it. Some people do backups, only to realise too late that the backups haven’t been working properly so when they’re needed they either contain data that is out of date, or in some cases, no data at all. If you’re really unlucky, you may find that the hard drive you’ve been using to backup your files onto is also damaged, or so neglected it doesn’t work. So how can you safeguard your files to make absolutely sure you are covered?
One solution is to have more than one backup disk. The more disks you have, the better protected you’ll be. With portable disk drives so cheap and easily available, it’s possible to have one backup disk for every day of the week. Label them up with that days Monday through to Sunday, and do a full backup onto each of them. After that, you can do an incremental backup each day, and you’ll effectively have seven backups of your hard-drive. So if one backup fails, you have six more to rely on. The chances of even two of your backups failing are remote, let alone seven. In fact, the odds of that happening are astronomical.
However, have you considered what would happen if your house were broken into or you suffer some kind of damage such as a fire? In these situations you could easily lose your computer and all your backups at the same time. In many cases, the data you own is much more valuable than the hardware, so you should make a plan to keep the data safe at all times. The best way to do this is to have a copy of your data offsite. If you work in an office, you could consider taking a backup disk to work with you. A simple rotation system would mean that you have a copy of your most recent data kept in your desk draw at work. You take a new disk with you one day, and bring home the old one. The chances of both your home and your office burning down or being broken into at the same time is just as remote as all your backups being damages. In addition, you’ll usually have a disk with you in transit, so at any one time you’ll actually have your data in three different places.
Other options include backing up your data to an online service. This can be just as costly as buying disks, and depending on the amount of data could take a very long time to upload and download, especially if you have movie files you want to protect.
You’ll also want to consider using encryption on your disks if you’re leaving personal data on your backups, especially in an unattended office overnight. There are many free programs such as Truecrypt that you can use to encrypt your data backups on the fly, to automatically protect your data.
Wednesday, September 14, 2011
ShareMeNot, Block Automatic Social Media Button Information Sharing
When you load a website on the Internet that has social media buttons embedded, you are automatically sharing information with those social media sites. And this happens even if you do not interact with those buttons at all. Facebook, Twitter or Google can use the data to track your movement on the Web. The absolute minimum that they get to know is the IP address, browser header (e.g. which browser is used, which operating system) and of course the visited web page. If you happen to be logged in, those information can be easily linked to the site’s account.
ShareMeNot is a new Firefox add-on that protects web users from those social media buttons. The add-on basically disables the button functionality until the user decides to interact with it. The extension does this without completely removing the buttons from the web pages.
The Facebook Like, Twitter tweet or Google+ buttons are still displayed along with information like the number of likes the site has received by other users.
ShareMeNot blocks communication with Facebook, Google+, Twitter, Stumbleupon, Digg and LinkedIn automatically on every web page the user visits after installing the add-on.
This is indicated by the add-on’s icon in the Firefox status bar which displays in red if elements are blocked from communicating with third party servers on the active web page.

Since the buttons are still displayed on the page, it is super easy to interact with them. A click on the button activates them. That’s actually all there is to it. It is alternatively possible to reload one or multiple buttons from the context menu of the add-on that is triggered with a click on the status bar.
You can furthermore disable the blocking of a specific service in the browser. This is done in the add-on’s preferences. The settings there contains a list of site exceptions where the trackers won’t be blocked on.

ShareMeNot is ideal for Firefox users who do not run add-ons like NoScript 24/7 on their browser. The solution itself is more elegant than previous solutions which simply removed the buttons and scripts from web pages, especially if those buttons are used from time to time by the user.
Firefox users can install ShareMeNot from the official Firefox add-on repository by clicking here.
ShareMeNot is a new Firefox add-on that protects web users from those social media buttons. The add-on basically disables the button functionality until the user decides to interact with it. The extension does this without completely removing the buttons from the web pages.
The Facebook Like, Twitter tweet or Google+ buttons are still displayed along with information like the number of likes the site has received by other users.
ShareMeNot blocks communication with Facebook, Google+, Twitter, Stumbleupon, Digg and LinkedIn automatically on every web page the user visits after installing the add-on.
This is indicated by the add-on’s icon in the Firefox status bar which displays in red if elements are blocked from communicating with third party servers on the active web page.
Since the buttons are still displayed on the page, it is super easy to interact with them. A click on the button activates them. That’s actually all there is to it. It is alternatively possible to reload one or multiple buttons from the context menu of the add-on that is triggered with a click on the status bar.
You can furthermore disable the blocking of a specific service in the browser. This is done in the add-on’s preferences. The settings there contains a list of site exceptions where the trackers won’t be blocked on.

ShareMeNot is ideal for Firefox users who do not run add-ons like NoScript 24/7 on their browser. The solution itself is more elegant than previous solutions which simply removed the buttons and scripts from web pages, especially if those buttons are used from time to time by the user.
Firefox users can install ShareMeNot from the official Firefox add-on repository by clicking here.
Monday, September 12, 2011
Free File Wiper, Delete Files So That They Cannot Be Recovered
When you delete files or folders in Windows they are either moved to the trashcan of the system or deleted directly. Regardless of the selected action, files remains recoverable on the system for some time. To explain it in simple terms: When you delete a file, the reference is removed by the operating system but not the file contents which still exist on the hard drive. This means that anyone with the right tools can recover those files as long as they have not been overwritten (for instance by new installations or files).
Free File Wiper is one of those tools that make sure that deleted files or folders cannot be recovered anymore. The program overwrites the occupied disk space with random characters so that files and contents cannot be recovered anymore.

The program on start up displays a trashcan icon on the desktop. You can move around the icon freely. Files and folders that you want to delete securely on the system need to be dragged and dropped onto the icon. A prompt is then displayed that warns you that the data won’t be recoverable after the operation. If you proceed, the file contents get deleted and overwritten. You can disable the confirmation window in the program options to delete data automatically without confirmation prompt.
The program supports four different modes. A quick erase mode that overwrites the data once, and three additional modes that use different patterns and overwrite the date multiple times on the hard drive.
The file eraser integrates into the Send To menu of Windows Explorer as well by default. You can use it to send files directly to the program for safe deletion.
Free File Wiper is a handy program for Windows users who want to make sure that data that they delete cannot be recovered. Handy to carry around on a portable drive or tool DVD.
The program runs on 32-bit and 64-bit editions of Windows XP, Vista and windows 7. It requires the Microsoft .NET Framework 2.0. Downloads are provided at the developer website.
Saturday, September 10, 2011
How To Cancel Drag And Drop Operations In Windows
Drag and drop operations can be very handy in Windows Explorer. You can use drag and drop to quickly copy or move files to another location, for instance to move files into a program window or another folder on the computer’s hard drive. Sometimes though you may start a drag and drop operation only to realize that you have selected some files or folders that you do not want to copy or move.
I know quite a few users who drop the selection into the same folder in this case to cancel the drag and drop operation. Since the files and folders exist in that folder, the operation is canceled and no files are added, moved or copied. When I’m saying moved or copied I mean that you can select the type of operation after you have started dragging files around but before you dropped them in a new location.
If you drop them while holding down the Shift key on the computer keyboard you move the files, while dropping them without additional key will copy the files.
But it is not always this easy. Especially not if you mistakenly drop the selection on a folder in the Windows Explorer location. If you do that, files and folders get moved or copied into that folder.
The correct way of canceling a drag and drop operation is to click the right mouse button once you have started to drag the files and folders around.
Windows will automatically cancel the operation so that everything is returned to its initial state. This only works for drag and drop operations in Windows Explorer, and not in third party applications like Firefox or Google Chrome.
Do you use drag and drop in Windows Explorer? If so, did you ever encounter a situation where you had to cancel the operation?
Friday, September 9, 2011
Avira 2012 Beta Versions Now Available
It is the time of the year again where security software developers are pushing out the regular yearly updates for their products. Avira has just started the official beta test for their new product line, which includes beta versions of Avira Free Antivirus, Avira Internet Security 2012 or Antivirus Premium 2012.
Windows users who are interested in participating in the beta to get their hands on the security software early, need to head over to the new Avira Beta Center where they need to register an account before they can do so.
Avira promises increased usability, reliability and stability in the new versions. This begins with the installation process which has now been streamlined so that for example Free Antivirus can be installed with just two clicks in express mode.
The programs will furthermore scan for potentially incompatible software like other security software automatically, giving the user the choice to remove the product or keep it installed regardless of the situation.

All program modules have been hardened to take into account new targeted malware attacks against security software. Avira notes that this includes the “ability to function without many registry keys, better protection against process termination and component deletion”.
A Fix Problem button has been added to the software to five users a one-click solution to issues that they encounter. That’s handy for inexperienced users in most cases as the software makes decisions for them.
Components have been updated in the 2012 releases. The firewall for instance is now able to filter IPv6 addresses on the adapter level, and mail and web protection are now able to work in IPv6 environments as well.
The Windows Hosts file will be protected in all Avira 2012 product versions against manipulation and tampering, a feature that was previously only available in Avira Internet Security.
Do the new features justify upgrading or installing the beta versions of the 2012 products? I personally would suggest to wait with the upgrade or installation in work environments, considering that beta products may still cause issues on a system.
Thursday, September 8, 2011
Search For Copied Photos with Who Stole My Pictures for Firefox
There is a high chance that people will copy your photos or images that you post on the Internet. Some do that with attribution, others without. Sometimes you may want to know where your images have been posted on. A simple example is your profile photo on Facebook or your Google Profile. Maybe you want to know if another site copied that photo and used it without your permission. If that is the case, you may want to contact the site owner to stop this from happening.
So called reverse image search engines can be used to find copies of your images on the Internet. The most prominent ones are Tineye, Yandex and the recently updated Google Image Search engine.
While you could use those image search engines manually every time you want to find copies of a picture on the Internet, it is often faster and more comfortable to use a browser extension to do so.
The Who stole my pictures add-on for Firefox offers those capabilities. The extension adds a new entry to the browser’s right-click context menu when the mouse cursor hovers over images.

You then have options to select one of the five support reverse image search engines separately (Baidu and Cydral are the remaining two), or perform a search on all five search engines directly.
If you select the latter option five browser tabs will open with the results of the five image search engines.
The options of the extension allow you to remove search engines from showing up in the context menu. This has also an effect on the multi-search option as removed image search engines are not included in that search anymore.
Who Stole My Pictures is a handy Firefox add-on for users who want to search for copies of images on the Internet. Firefox users can install the extension directly from the official Mozilla Firefox add-on repository.
Wednesday, September 7, 2011
Convert Img To Iso
The img file format is a common disk image format that is supported by the majority of CD and DVD burning and disk mounting programs. Sometimes though you might want to convert the img format to Iso, for instance if the program that you are using for a specific task is not supporting the img format at all.
While it might work to simply rename the img file extension to iso, it sometimes is not that simple to convert the file. The Img to Iso converter has been created for those cases.

The program interface is very minimalistic. There are barely any options available, not that one would expect a lot of options in a converter like this.
You select the source img file with a click on open. This opens the computer’s file browser where you can navigate to the folder containing the img disk file. Img to Iso supports both *.img and *.ima files. The files in the file browser are automatically filtered so that only those two formats are displayed.
A click on save in the Iso file line opens the very same file browser. This time though you need to specify a file name and location for the Iso file that the Img file is converted to.
A click on the Convert button starts the conversion process. This usually does not take long. The program does not alter or delete the Img file after the process. You may want to delete it manually after verifying that the Iso image works properly.
Windows users can download the free Img to Iso converter from the developer website. The program is compatible with 32-bit and 64-bit editions of Windows Vista and Windows 7. It uses Microsoft’s Virtual Hard Disk technology for its functionality, which means that the program needs to be started with elevated rights on the supported operating systems.
While it might work to simply rename the img file extension to iso, it sometimes is not that simple to convert the file. The Img to Iso converter has been created for those cases.
The program interface is very minimalistic. There are barely any options available, not that one would expect a lot of options in a converter like this.
You select the source img file with a click on open. This opens the computer’s file browser where you can navigate to the folder containing the img disk file. Img to Iso supports both *.img and *.ima files. The files in the file browser are automatically filtered so that only those two formats are displayed.
A click on save in the Iso file line opens the very same file browser. This time though you need to specify a file name and location for the Iso file that the Img file is converted to.
A click on the Convert button starts the conversion process. This usually does not take long. The program does not alter or delete the Img file after the process. You may want to delete it manually after verifying that the Iso image works properly.
Windows users can download the free Img to Iso converter from the developer website. The program is compatible with 32-bit and 64-bit editions of Windows Vista and Windows 7. It uses Microsoft’s Virtual Hard Disk technology for its functionality, which means that the program needs to be started with elevated rights on the supported operating systems.
Sunday, September 4, 2011
Fixing "BOOTMGR is missing" Error While Trying to Boot Windows 7 or Vista
If your Windows 7 or Vista computer has encountered the dreaded “BOOTMGR is missing” error, you aren’t alone. If the problem isn’t hardware related you can fix it with relative ease as long as you have a Windows DVD handy.


At this point you should be able to reboot your computer, remove the DVD and everything should be working.

Boot off the Windows Vista DVD and then click Next at the first prompt:

You should see a link in the lower left-hand side for “Repair your computer”

The installation process will attempt to find your Vista installation directory. If there’s more than one in the list, select the correct one and then use the Next button again.

Click the first link for “Startup Repair”

The installation process will repair the system, and then prompt for you to reboot.

Alternatively you could have chosen the Command Prompt option instead, and use the following command to fix the boot options only:
bootrec /fixboot

At this point you should be able to reboot your computer, remove the DVD and everything should be working.
Wednesday, August 24, 2011
Error Code 66A when Updating Microsoft .NET Framework 4 from Windows Update
One of the first thing that I normally do after installing Windows is to disable the automatic Windows Update. Although automatic update is a very convenient way to keep Windows up to date, but I personally do not like Windows or any third party software to automatically do things in background without my knowledge, unless I schedule it to do that. All I need to do is manually check for updates using Windows Update in Control Panel every Patch Tuesday (second Tuesday of each month) as that is when Microsoft releases security patches.
The recent Patch Tuesday released 2 updates and 1 security update for Microsoft .NET Framework 4 with a couple of other updates for Windows. All updates installed without problems except the 3 updates for .NET Framework 4, failing with the error code 66A (Windows Update encountered an unknown error). I tried to install one by one but still no luck.

At first I wanted to reset the Windows Update components using the official Microsoft Fix it 50202 tool but after thinking for a while, this error code 66A should have nothing to do with a broken Windows Update since other updates were able to install except for .NET Framework 4.
My guess is that probably Microsoft .NET Framework 4 has somehow got corrupted and needs to be reinstalled. Instead of uninstall and reinstall Microsoft .NET Framework 4, I should try the repair option first. Go to Control Panel > Programs and Features > select Microsoft .NET Framework 4 Client Profile from the list and click on the Uninstall/Change button. The Microsoft .NET Framework 4 Client Profile Maintenance window will open and select the “Repair .NET Framework 4 Client Profile to its original state”. Click next and follow the on-screen instruction.

After finished repairing .NET Framework 4, I went to Windows Update again and try to install the 2 updates and 1 security update. This time Windows Update reports “The updates were successfully installed” with a checkmark which means the repair fixed the problem and allowed the updates to be installed. I have no idea when or how did the Microsoft .NET Framework 4 got corrupted in the first place.
The recent Patch Tuesday released 2 updates and 1 security update for Microsoft .NET Framework 4 with a couple of other updates for Windows. All updates installed without problems except the 3 updates for .NET Framework 4, failing with the error code 66A (Windows Update encountered an unknown error). I tried to install one by one but still no luck.

At first I wanted to reset the Windows Update components using the official Microsoft Fix it 50202 tool but after thinking for a while, this error code 66A should have nothing to do with a broken Windows Update since other updates were able to install except for .NET Framework 4.
My guess is that probably Microsoft .NET Framework 4 has somehow got corrupted and needs to be reinstalled. Instead of uninstall and reinstall Microsoft .NET Framework 4, I should try the repair option first. Go to Control Panel > Programs and Features > select Microsoft .NET Framework 4 Client Profile from the list and click on the Uninstall/Change button. The Microsoft .NET Framework 4 Client Profile Maintenance window will open and select the “Repair .NET Framework 4 Client Profile to its original state”. Click next and follow the on-screen instruction.

Sunday, August 14, 2011
Operate Task Manager from Excel with Useful Suspend Process Command
TaskManager.xls is a simple taskmanager implemented in an Excel spreadsheet. It can show you the list of the running processes; and terminate, suspend or resume selected processes. In Windows XP, Windows Vista or Windows 7 easy way to command Task manager would by by pressing CTRL + SHIFT + ESC.
When working on a PC that has been compromised by a virus or spyware you will find yourself with the Task Manager disabled. Malware creators like to disable Task Manager so it makes solving the problem and removing the issue difficult. When you are stuck with such problem, one easy way to ensure the processes running on your computer is to use a Task Manager that you can run from MICROSOFT EXCEL!
TaskManager.xls is a simple taskmanager implemented in Excel/VBA. You can use the command column (Column A) to execute commands on the processes. You can use the following commands:
r -> Resume process
s -> Suspend process
Push button “List processes” to list all processes:

When working on a PC that has been compromised by a virus or spyware you will find yourself with the Task Manager disabled. Malware creators like to disable Task Manager so it makes solving the problem and removing the issue difficult. When you are stuck with such problem, one easy way to ensure the processes running on your computer is to use a Task Manager that you can run from MICROSOFT EXCEL!
TaskManager.xls is a simple taskmanager implemented in Excel/VBA. You can use the command column (Column A) to execute commands on the processes. You can use the following commands:
r -> Resume process
s -> Suspend process
t -> Terminate process

TaskManager.xls can't be ran in Openoffice. You need to view this app in windows and in MS office. I've not tested this app on MAC as well, if anyone test it let me know.
Saturday, August 13, 2011
Choosing a Safe Password
Remember Rule #1...It's golden - Easy to remember is easy to steal, it is as simple as that. Human beings think that it is OK to use a simple and easy password, without thinking a way to choose a safe password. Having as easy password is risky especially when your password protects some sensitive information like emails, online banking, etc.
A huge number of security risks start with a stolen password. This makes it very important for a user to know how to set a safe password. From security point of view a secure password is a combination of random numbers, letters, upper & lower case characters. Passwords like these can be hard to remember so people write them down, which is a bad habit (as bad as a weak password). So, it is important to have a password that can be remembered and can be categorized as a safe password and this software will create safe password for you and teach you how to remmember them by using phonetic pronunciation.

The PC Tools Password Utilities includes useful features to make creating, checking and managing passwords much simpler.
Included in Password Utilities are my two favorite features:
Password Generator - is an offline version of the web-based Password Generator which allows you to securely and easily create passwords locally on your own PC.
Password Checker - a new feature that lets you check the quality and strength of a password. By entering your password in the checker it will run a series of tests on the password to indicate how strong it is, and therefore how easy it may be to guess or crack.
Download PC Tools Password Utilities here.
A huge number of security risks start with a stolen password. This makes it very important for a user to know how to set a safe password. From security point of view a secure password is a combination of random numbers, letters, upper & lower case characters. Passwords like these can be hard to remember so people write them down, which is a bad habit (as bad as a weak password). So, it is important to have a password that can be remembered and can be categorized as a safe password and this software will create safe password for you and teach you how to remmember them by using phonetic pronunciation.

Included in Password Utilities are my two favorite features:
Password Generator - is an offline version of the web-based Password Generator which allows you to securely and easily create passwords locally on your own PC.
Password Checker - a new feature that lets you check the quality and strength of a password. By entering your password in the checker it will run a series of tests on the password to indicate how strong it is, and therefore how easy it may be to guess or crack.
Download PC Tools Password Utilities here.
Block Unwanted/Suspicious Websites with HostMan
You can block any unwanted/Suspicious sites through a Windows file called hosts file. Yes your right, if you know how to edit then you don't need to shell out extra buck for a website blocker software. But unfortunately, editing it manually is quite difficult specially for ordinary windows user. To make this simple, I will present you to a free software called HostsMan. HostsMan is a free application that enables you to manage your Hosts file with just a few clicks.

The usage is simple, to add a website to block, from the main screen click Open Hosts icon. This will open the hosts editor, click Add to create new entry. From the host names field, enter the website address of the site you want to block. For example, you can put facebook.com or any other social networking site. Click Add to save the new record. That's It! Block websites will be in effect on the next reboot.
Download HostsMan
Friday, August 12, 2011
Simple way of backing up and reloading your Windows XP Drivers
Some of you might be tired of installing drivers whenever you install fresh copy of Windows XP, I know I am.. In this tutorial I will show you how you can back up your drivers and save them to your USB flash drive or CD/DVD disc. Here is a BAT script that will help you backup your drivers so you dont have to go through the drivers process again whenever you reinstall your Windows XP.
Copy and paste this script in Notepad or your favorite text editor and save it as DriveCopy. Rename the TXT extension to BAT. Viola, now you have the batch file.


Copy and paste this script in Notepad or your favorite text editor and save it as DriveCopy. Rename the TXT extension to BAT. Viola, now you have the batch file.
echo offWhen you open this script it will start copying files into your C:/ drive hidden folder called olddrivers (you have to unhide them in folder options to see them). After you reformat, you go to device manager and reinstall the question mark drivers. When it ask for the cd, put it in.
cls
pause
md \olddrivers
cd \olddrivers
xcopy c:\windows\help /h /y
xcopy c:\windows\inf /h /r /y
xcopy c:\windows\system /h /r /y
xcopy c:\windows\system32 /h /r /y
xcopy c:\windows\system32\drivers /h /r /y
pause


Quick Tip - Change the conversation view in Gmail
Something interesting that caught my eye on the Gmail' settings tab while I was messing around with options. Google: Gmail Team implemented new option which allows you to have under 25 convos on a page size which is a great idea. Simply go to your Gmail's settings layout and pick 10,15 or 20 from the drop-down menu. Before only available options were 25, 50 and 100.
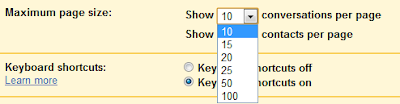
These new settings are handy if u don't recive too many messages or if you want to improve Gmail's performance. Gmail loads a lot faster if it only has to fetch 10 conversations instead of 25.
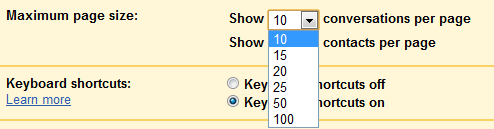
Thursday, August 11, 2011
VirtuaWin Review – The Virtual Desktop Manager
It’s been couple of days now since I last reviewed a piece of software so I guess it’s time. This time I am going to review a tidy little application called VirtuaWin.
VirtuaWin is a virtual desktop manager for the Windows operating system that allows you to manage multiple applications over virtual desktops (or workspaces). Some of you might be familiar with this idea if you’ve used one of the many flavors of Linux.
Main thing I love about this app is the size. The binary is only 382kb and downloads in just a few seconds. It’s also very easy to configure. The only tuning I had to do was name the four virtual desktops I was going to use and assign them each a hot key. I’ve set VirtuaWin up to use the Windows Key plus the numbers 1 through 4 (respective to the virtual desktop I created).
There are many of options that can be set but really the name and hot keys were all I had to do to get it going . One option I would consider setting up is the mouse functions. You can set VirtuaWin to let the mouse direct which virtual desktop is selected. I did try it out and it was pretty awsome. When I would move the mouse off the right side of the screen it would move over one virtual desktop and when I moved the mouse off the bottom of the screen under the taskbar it would go down one virtual desktop. OK so my terminology is a little off but if you look at the screen shot that shows the little tray icon you will see what I mean. It’s separated into four quadrants.

On the VirtuaWin website you can find a bunch of add-ons (called modules) and icon sets. It’s a very configurable and customizable program.
The one and only thing that I was able to find that I didn’t like was the sheer amount of settings. You can get quite involved in tweaking. My personal preference is dead simple and I’m not a huge fan of tweaking. I prefer to run things more or less “out of the box”. Anyway, once I figured out which options I needed to change I was all set to go in just a matter of minutes. It took me a lot longer to write this post than it did to figure out how to use the program.


You can get VirtuaWin here.
VirtuaWin is a virtual desktop manager for the Windows operating system that allows you to manage multiple applications over virtual desktops (or workspaces). Some of you might be familiar with this idea if you’ve used one of the many flavors of Linux.
Main thing I love about this app is the size. The binary is only 382kb and downloads in just a few seconds. It’s also very easy to configure. The only tuning I had to do was name the four virtual desktops I was going to use and assign them each a hot key. I’ve set VirtuaWin up to use the Windows Key plus the numbers 1 through 4 (respective to the virtual desktop I created).
There are many of options that can be set but really the name and hot keys were all I had to do to get it going . One option I would consider setting up is the mouse functions. You can set VirtuaWin to let the mouse direct which virtual desktop is selected. I did try it out and it was pretty awsome. When I would move the mouse off the right side of the screen it would move over one virtual desktop and when I moved the mouse off the bottom of the screen under the taskbar it would go down one virtual desktop. OK so my terminology is a little off but if you look at the screen shot that shows the little tray icon you will see what I mean. It’s separated into four quadrants.
The one and only thing that I was able to find that I didn’t like was the sheer amount of settings. You can get quite involved in tweaking. My personal preference is dead simple and I’m not a huge fan of tweaking. I prefer to run things more or less “out of the box”. Anyway, once I figured out which options I needed to change I was all set to go in just a matter of minutes. It took me a lot longer to write this post than it did to figure out how to use the program.


You can get VirtuaWin here.
Monday, August 8, 2011
Win7 Performance tweak
Hey everyone I've been tweaking with my machine lately testing a lot of different thing's/setting's and I thought I would share this with the my readers.
It tweaks your performance by turning off useless thing's like screen slowly coming up when you click on a tab. With my setting's it's immediately faster than "stock" if you have a low end computer.
You can find it by going to Control Panel >System >Performance Information and Tools >Adjust Visual Effect's. This may be one of the oldest thing's you could use but im simply posting this as a "noob" tutorial.
Once you get the the screen adjust the setting's so everything look's like mine.

Once these setting's are applied your computer will be much faster with page loading and will be a less hog on your processor. This will still be able to run Aero if your machine is applicable to do so. It's very handy and work's like normal with little to no difference. I know this isn't the best "tutorial" but I know it will help some people out at least.
Sunday, August 7, 2011
Find Font Names from Images with WhatTheFont
Have you ever found a picture containing pretty fonts and you don't know its name, WhatTheFont will help you identify the name of the fonts used in the picture.
All you have to do is submit the image url and it will be processed. Alternatively, you can even uploade images that are stored on your computer.


After uploading is done, WhatTheFont tries to find the closest matches from their database. I find this a very useful tool for Web Designers. They also have iPhone application available. Hopefully we will see the Android application soon.
Friday, August 5, 2011
URL Snooper
URL Snooper allows you to extract links that are masked or hidden behind scripts and/or server redirection. It uses WinPcap and acts as a small network sniffer, that automatically filters all URL requests that it encounters. You can further filter the list to only show multimedia links.
For example when user tries to download Adobe Flash Player, by default they will be asked to download the Adobe Download Manager first and then the download manager will then automatically download the Flash Player without showing the URL to the user. So let's give URLSnooper a try to identify those hidden URLs.


Note: This program is donationware. It is free to try, but the author accepts and encourages donations towards further development.
[Download URLSnooper]
For example when user tries to download Adobe Flash Player, by default they will be asked to download the Adobe Download Manager first and then the download manager will then automatically download the Flash Player without showing the URL to the user. So let's give URLSnooper a try to identify those hidden URLs.


Look for http exe file and you should see a few of them. It is pretty obvious that the Adobe Flash Player installer setup file is http://fpdownload.adobe.com/get/flashplayer/current/install_flash_player_ax.exe while the other two is the McAfee Security Scan and Google Toolbar.
Note: This program is donationware. It is free to try, but the author accepts and encourages donations towards further development.
[Download URLSnooper]
Thursday, August 4, 2011
Configuring an SSH tunnel using PuTTY for Windows
SSH tunneling permits you to establish an encrypted network tunnel between your home machine and remote site. This how-to will help you establish an SSH tunnel with Putty, a free software client. We will be connecting to the computer at 130.225.220.38 (port 80) through the server at tech-globe.net (port 22), using the local port of 8088.
1. Start Putty by double-clicking the Putty icon or opening it through the Start menu.
2. Click "Session." Here you will enter the details of the forwarding server you are connecting to.

3. Enter the address of the server that is running SSH in the Host Name field and the port number in the Port field. In our example, the address is tech-globe.net and the port is 22.
4. Select "SSH." Click "Connection" in the left pane, then "SSH," then "Tunnels." Here you will enter the information regarding the computer you are ultimately connecting to.
5. Enter the port number you wish to use as the local port into the Source Port field. This is the port that you will connect to using the program you wish to tunnel with, and cannot be in use by any other application. In our example this port is 8088.
6. Enter the address of the computer you wish to ultimately connect to followed by a colon and the port number into the Destination text field. In our example, this is 130.225.220.38:80
7. Select "Local," then click "Add."
8. Click "Open" to begin your SSH session. You will be prompted for your username and password.
Wednesday, August 3, 2011
How to Extract from/Fix corrupted zip files tutorial
It is very uncommon that a zip archive gets corrupted but when it happens it is impossible to extract any content from zip files not even those uncorrupted files inside zip or self-extracting archives. If you are in such situation where you need to fix or repair corrupted zip files then here is freeware tool Zip2Fix which can help you in extracting partial content from corrupted zip or sfx files.
I'm going toshow you how you can extract files from a corrupted zip archive. I also consider this to be a "fix" because it creates a new archive with the files that aren't corrupted.
1. Download zip2fix. You can get it here.
2. Now that you downloaded it, extract the file and then run it . No need to install It's portable ;)

3. Now, just click "Open", and browse to the corrupted .zip file you want to extract from.

4. As soon as you open the corrupted zip file, zip2fix will automatically start scanning the archive and detect which files are actually corrupted.

5. It will also make a seperate zip file with the files that aren't corrupted so you can extract those later.

Thas it. Now, just extract your files from the new archive that was created.
I'm going toshow you how you can extract files from a corrupted zip archive. I also consider this to be a "fix" because it creates a new archive with the files that aren't corrupted.
1. Download zip2fix. You can get it here.
2. Now that you downloaded it, extract the file and then run it . No need to install It's portable ;)

3. Now, just click "Open", and browse to the corrupted .zip file you want to extract from.

4. As soon as you open the corrupted zip file, zip2fix will automatically start scanning the archive and detect which files are actually corrupted.

5. It will also make a seperate zip file with the files that aren't corrupted so you can extract those later.
Thas it. Now, just extract your files from the new archive that was created.
Subscribe to:
Comments (Atom)